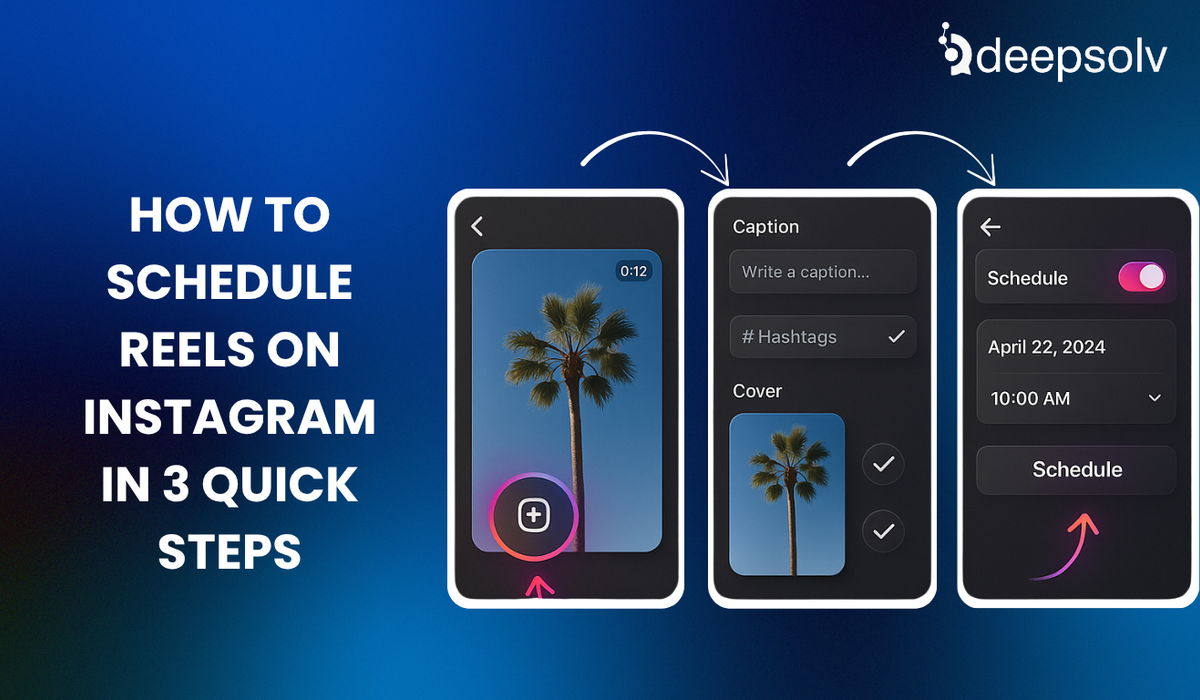
How to Schedule Reels on Instagram in 3 Quick Steps
5 min read
Published: 6/18/2025
Why Scheduling Reels Matters for Business Owners and Creators
In today’s content-saturated world, consistency isn’t optional- it’s your growth strategy. Reels, with their high engagement rates and algorithmic preference, have become one of the most powerful formats for reaching new audiences on Instagram. But planning and posting them manually every day? That’s where things fall apart.
Enter scheduling.
By pre-scheduling your Reels, you gain control over your content calendar, maintain visual consistency, and free up mental bandwidth to focus on what really matters- community engagement and sales.
The best part? Instagram now lets you schedule Reels directly from the app and if you’re managing multiple accounts or working from a desktop, Meta Business Suite makes it even easier.
Let’s break it down into three simple steps.
1. Use Instagram’s Mobile App Scheduler
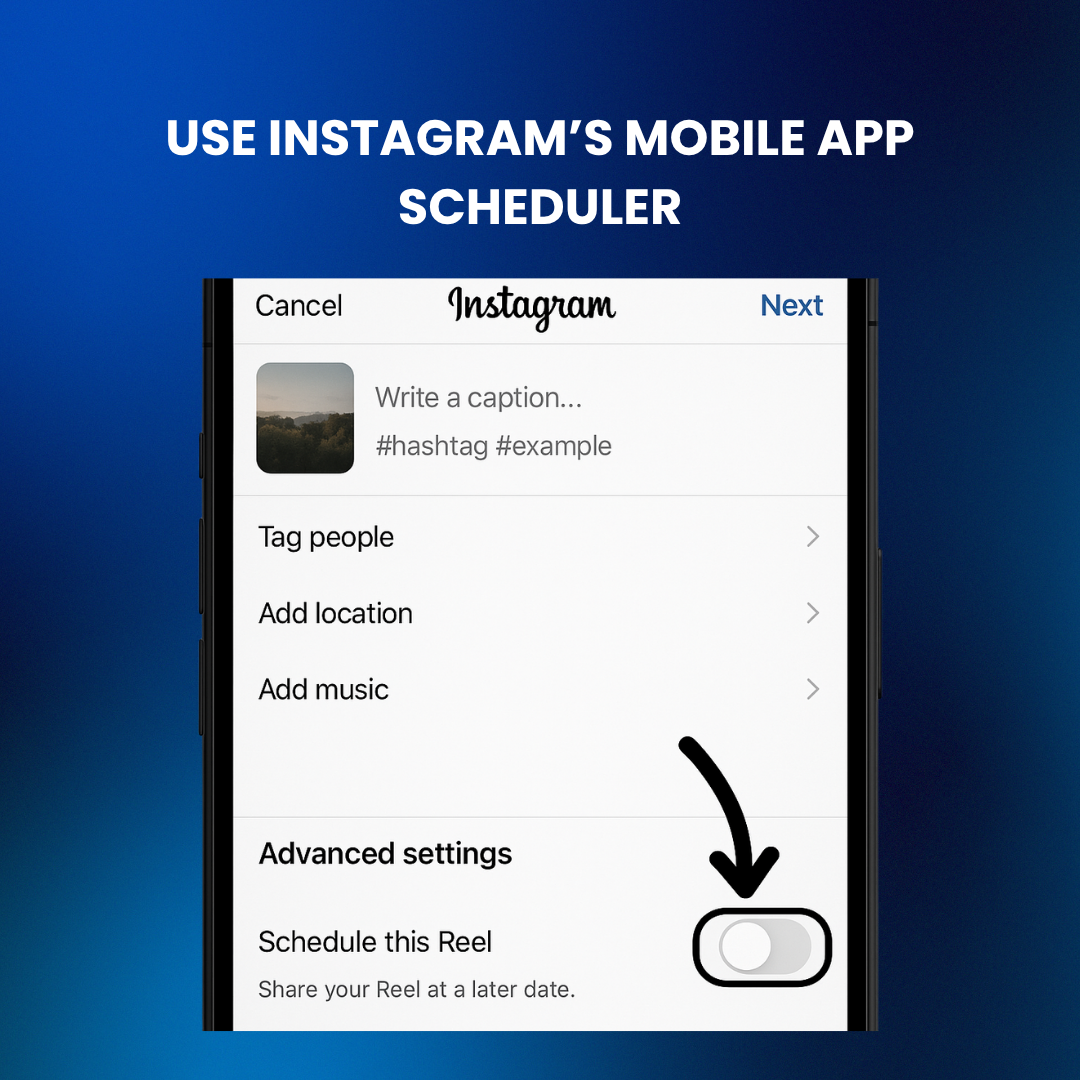
Instagram’s native scheduling tool is built right into the app- no downloads, no external logins. Here’s how to use it:
- Open the Instagram app on your phone.
- Tap the + icon at the bottom and select Reel.
- Upload your video (up to 90 seconds), add filters, music, captions, and product tags as needed.
- Scroll down and tap Advanced Settings or More Options.
- Toggle Schedule this Reel ON.
- Pick your preferred posting date and time (up to 75 days in advance).
- Tap Done, return to the main screen, and hit Schedule.
Your Reel is now in Instagram’s backend queue and will be published automatically at your chosen time.
2. Use Meta Business Suite on Desktop
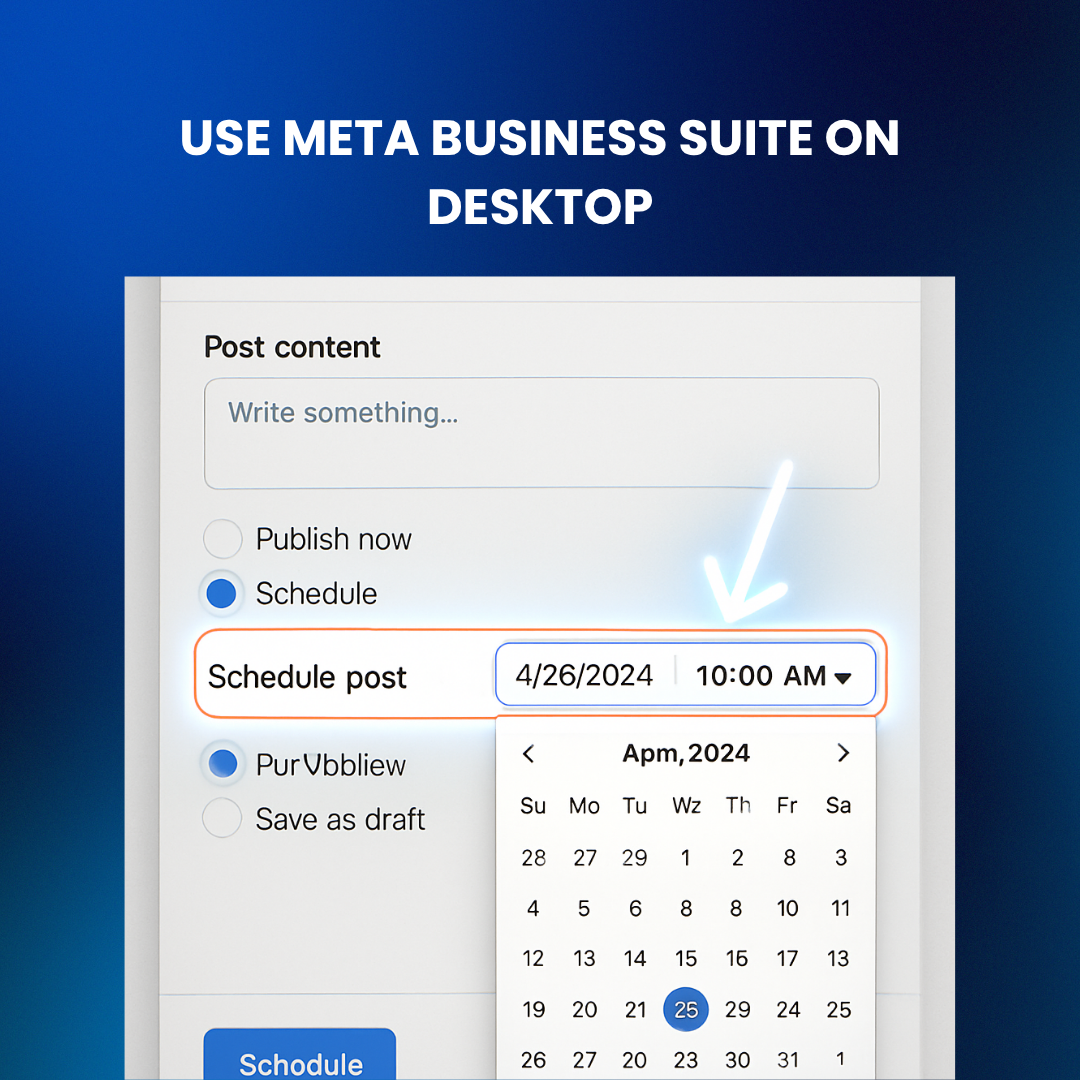
For creators and social media managers who prefer desktop workflows or those juggling multiple accounts- Meta Business Suite is your go-to. While the scheduling window is slightly shorter (up to 29 days), the control it offers is substantial.
Follow these steps:
- Go to Meta Business Suite and log in.
- Navigate to Planner or Content.
- Click Create Reel.
- Choose your Instagram business/creator profile.
- Upload your video, write a compelling caption, and add relevant hashtags.
- Click Next, switch to the Schedule tab.
- Pick the date/time (20 minutes to 29 days ahead).
- Hit Schedule to finalize.
Your Reel will now be automatically published to Instagram at the scheduled time. No notifications, no reminders- it just posts.
Note: You must have a connected Facebook page and use an Instagram Business or Creator account to access this feature.
3. Engage Your Audience After the Reel Goes Live
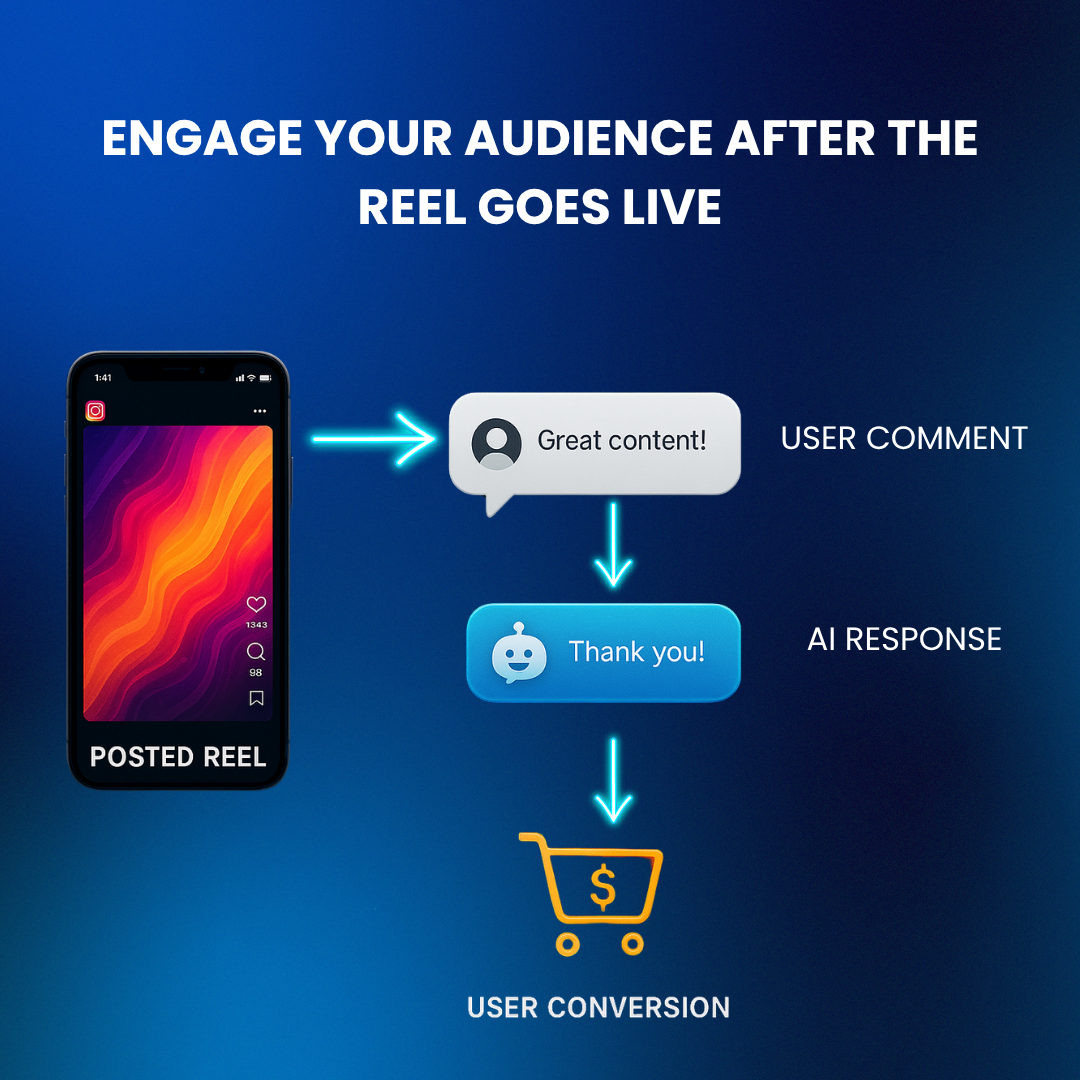
Scheduling is just the beginning. What separates good content from great performance is what happens after your Reel is posted.
Once your Reel goes live, Instagram’s algorithm watches how fast and how frequently your audience engages. Replies to comments, shares, saves, and DMs all influence whether the platform pushes your Reel to more users.
Here’s the catch: most creators and brands don’t respond fast enough.
This is where Deepsolv makes a difference.
Deepsolv is an AI-powered automation platform built for digital social media channels for brands. It replies to comments and DMs in real-time, tailoring responses to the context of the post and your brand tone. More importantly, it retargets users who engaged with specific Reels by sending them personalized messages- ideal for re-promoting restocked products, upcoming offers, or limited-time bundles.
Instead of spending hours replying to every “How much?”, “COD available?”, or “Link please”- let Deepsolv step in. Customers feel heard. You stay on-brand. And sales go up.
Think of it this way: you schedule your Reel to show up at the right time, and Deepsolv helps you show up at the right moment afterward.
Bonus: How to View or Edit Scheduled Reels
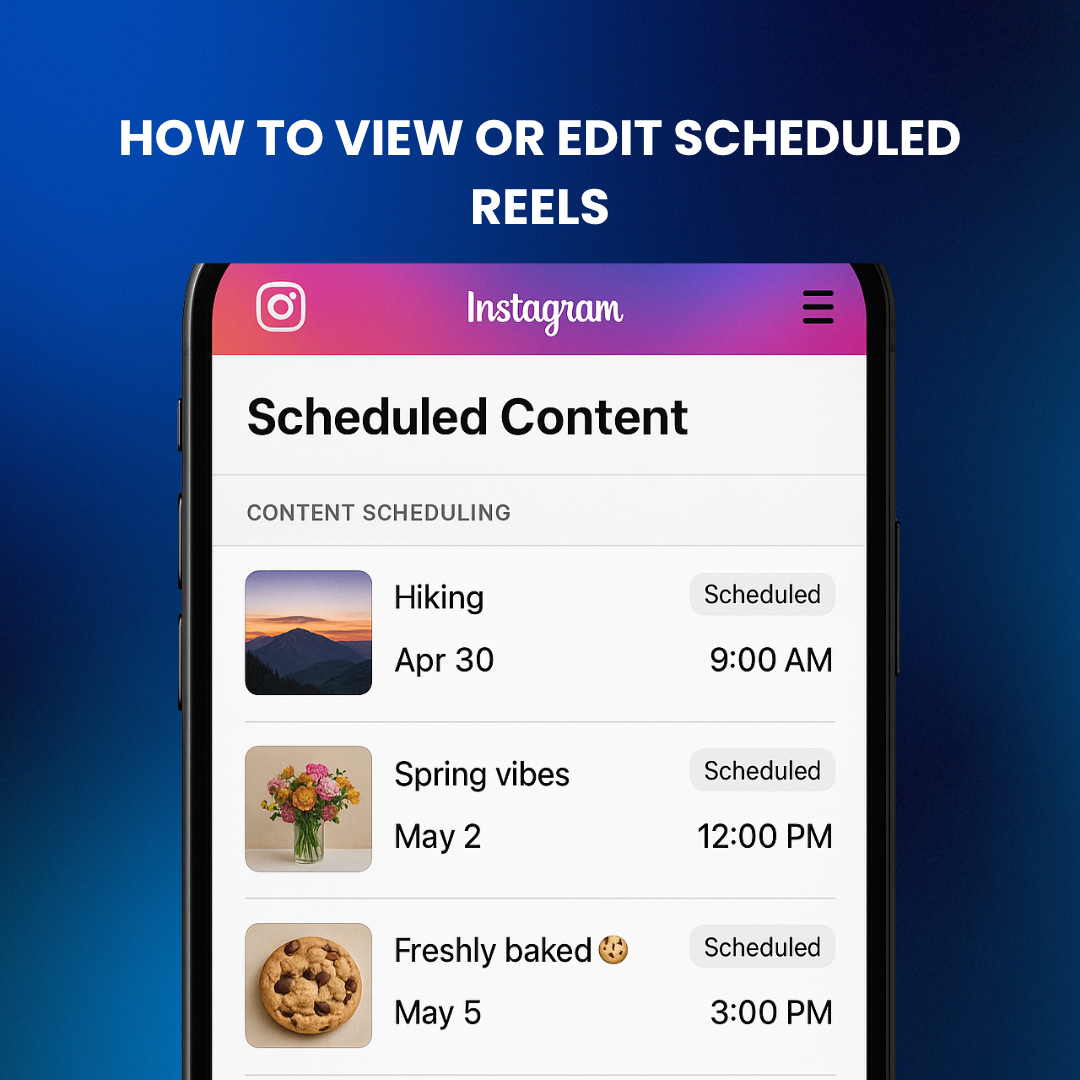
Many users schedule Reels but later need to make changes. Here's how to access your scheduled content:
- Open your Instagram app.
- Tap your profile, then tap the hamburger menu (☰) in the top right corner.
- Select Scheduled Content.
- Tap on any scheduled Reel to edit caption, change time, or delete it.
Note: You cannot replace the video itself- if you need to swap the file, you’ll have to recreate the Reel.
This feature also answers one of the most common search queries: "How do I see my scheduled Reels on Instagram?"
Final Takeaway: Schedule Smart, Engage Smarter
Scheduling Reels is no longer just a “nice to have”- it’s essential for consistency, planning campaigns, and freeing up your time. But don’t stop at scheduling. What happens after your Reel is posted can make or break its reach.
With tools like Instagram’s native scheduler and Meta Business Suite, you can plan your content effortlessly. And with Deepsolv managing your post-engagement with smart replies, DMs, and retargeting- your content not only shows up on time, but converts at scale.
✅ Want to see how your scheduled Reels can drive sales faster? Schedule a free strategy call with Deepsolv and turn automation into ROI.
FAQs
Frequently asked questions related to this blog post